Translate

Showing posts with label Understanding Google Photos. Show all posts

Saturday, March 7, 2020

If I get free, unlimited storage, why is Google Photos telling me to buy storage for $1.99/mo?

It may look like Google is telling you to buy 100 GB for $1.99/mo, but what they're actually doing is just offering it to you.

If you choose the High Quality setting, you do get free unlimited storage, you don't need to buy anything.

High Quality means that Google stores up to 16 megapixel photos and 1080p videos with an extra compression to reduce the file size. My cameras all take photos less than 16 megapixels, so this is fine with me and I like the reduced file size. 

Your Google Storage Allotment

Google gives everyone 15GB of free storage space. Keep in mind that your Google storage is shared among Gmail, Google Drive, and Original quality Google Photos. You can see how much you are using by going to MyAccount.Google.com and be logged in with your Google account. 
You will see sections for privacy, security, and Account storage. In the account storage section, click the link to "Manage storage" and you will see your total allotment as well as the amount being used by Drive, Gmail, and Photos.

What is Google One? Think phone support.

If you choose to buy 100 GB for $1.99/month, you become a member of Google One. That is simply what Google has chosen to call it when you pay for storage rather than just using the free allotment. 

If you become a member of Google One, there are a few other benefits. You get support from Google, even for the free products like Google Photos. Think about that, for $2/month you get phone support. You can talk to a real human being. I've heard reports ranging from "solved my problem quickly" to "totally useless." But, that is the nature of phone support in general, right? I think it's pretty amazing to get phone support for $2/mo.

My Google Photos setting changed to Original

When you become a Google One member, Google apparently assumes you want to use that storage for your photos and the default selection for file size changes from High Quality to Original. It took me a while to realize this. I've always chosen to store my photos in High Quality. I am now paying $2/mo for the Google One membership, but my reason is to have access to phone support. I don't know how long I will continue the membership and I still want my photos to be stored for free with the High Quality setting. My current storage stats show that Google Photos is taking up 2.81 GB.

I found the culprit by checking my iPhone Google Photos settings. I had uninstalled and reinstalled the program, not noticing that the default size setting had changed to Original. I have now set it back to High Quality, but what about the photos that are already stored at High Quality?

Recover Storage

There is a button that will review all your stored photos and, retroactively, compress them to High Quality. It's called Recover Storage, and you'll find it on the Google Photos settings on the web version. Here is a video on how to use it.


Billed thru iTunes?

When someone showed me an email that iTunes was billing them for Google Photos storage, I thought it was a scam. Google storage would be billed thru Google. Since when was Apple doing Google's collections for them?!? But, apparently it is true. You can sign up for that $2mo 100 GB using your iPhone and your Apple ID.
If you think an email about an iTunes charge may be a scam, here is Apple's help for identifying legitimate emails from them.


Chris Guld is President and Teacher-in-Chief at GeeksOnTour.com. She has been in computer training and support since 1983. She is now a Product Expert for the Google Photos Forum, owner of the LearnGooglePhotos.com blog, and author of Mrs. Geek's Guide to Google Photos
She loves to teach! If you want to learn, you’ve come to the right place.

Wednesday, June 19, 2019

What's happening with Google drive and Google Photos?

Google has announced that they're changing how Google Photos and Google Drive are working together, When Google makes this change - planned for July 10 - there will no longer be a direct relationship - see the diagram at right. One thing to understand is that you may have never had the relationship to begin with because it depended on your turning on a setting.

The settings that are being removed

If you never turned on these settings, then nothing is changing for you. You can check them now:
  1. In Google Photos, 3-line menu, Settings, Google Drive: Sync photos & videos from Google Drive
    is yours on? or off?
  2. In Google Drive, it's the gear icon in the upper right then Settings, Create a Google Photos folder.
    Is yours on? or off?
If you do have them on, then here's what will happen when Google removes them:
  1. The Google Photos folder in my drive will stop getting new photos from Google Photos. What's already in that folder will remain.
  2. New photos added to Google Drive will no longer show up in Google Photos. Any photos already in Google Photos will remain.

The implications of this change

If you depended on the Google Photos folder in Drive to sync your phone's photos down to your computer, you need to find an alternate way to do this. I recommend another cloud storage service such as Microsoft OneDrive, Dropbox, or Amazon Photos.
Before the breakup, it was possible to take pictures on a phone and have them synced to a computer.


If you depended on photos being in Drive so that 3d party programs could access them, they won't be there automatically. You will need to download photos from Google Photos to your computer, then you can upload them to Drive if needed. If you manually upload them to drive, they will take up your Google Drive storage allotment. If you lete Backup and Sync to the uploading, you can select the High Quality setting to access the unlimited storage feature.
If you regularly save images to Google Drive, you will be able to copy any of them to Google Photos with a new manual import tool. 

One more side effect from the breakup is that YouTube will lose its "Import your videos from Google Photos" feature, this is the only thing I will personally miss.

Other Articles

This is a hot topic right now and a lot of articles have been written about it. Many of them have wrong or misleading information in them and serve to prove the point that the relationship between Google Photos and Google Drive has been very confusing. One article besides the official announcement that I can recommend for further detail is PeggyK's article. She is a highly respected Product Expert for several Google products Her article includes what will happen on July 10 and how it will affect your Google Storage quota.

Chris Guld is President and Teacher-in-Chief at GeeksOnTour.com. She has been in computer training and support since 1983. She is now a Product Expert for the Google Photos Forum, owner of the LearnGooglePhotos.com blog, and author of Mrs. Geek's Guide to Google Photos
She loves to teach! If you want to learn, you’ve come to the right place.

Wednesday, October 17, 2018

Are your cellphone photos backed up? Are you sure?

When you take some new photos, you will see them right away in the Google Photos app. That DOES NOT mean they’ve been backed up. Google Photos will show you photos in your camera roll on the device. At the top of your Google Photos library, you will see information about the progress of your backup.
It may say, “waiting for Wi-Fi to backup” – the default setting is to not allow Google Photos to backup using your cellular data. Your phone must be connected to Wi-Fi then. So, connect your phone to Wi-Fi, then open Google Photos again and look at the top to be sure that the backup is now in progress. Watch it and eventually you will see “Backup Complete”
I also recommend verifying that you know how to see the photos in your account by going to a computer and go to photos.google.com and log in with the same account – you will now see all the photos that are backed up.
Free Up Space: this is the command that – with one tap – will delete all the device copies of your photos after they are backed up to Google Photos. Mrs. Geek recommends not to use that command until after you have your photos copied to one more location. You want to make sure that you have at least 2 copies of your photos!

Tutorial Video - watch the first 8 minutes

In episode 154 of our What Does This Button Do? show, we teach about cell boosters, but we begin the show with a Google Photos tip where we demonstrate everything in this article.


Chris Guld is President and Teacher-in-Chief at GeeksOnTour.com. She has been in computer training and support since 1983. She is now a Product Expert for the Google Photos Forum, owner of the LearnGooglePhotos.com blog, and author of Mrs. Geek's Guide to Google Photos
She loves to teach! If you want to learn, you’ve come to the right place.

Wednesday, February 28, 2018

Google Photos: Everything you need to know

I wrote a book about Google Photos. It's titled Mrs. Geek's Guide to Google Photos. The subtitle is "Your lifetime of photos, effortless and free." I keep thinking, if Google Photos is so effortless, why do I need a 100+ page book to teach how to use it?
I've come up with these 14 points as all you really need to know. The links to videos are for GeeksOnTour.com premium members. Please leave a comment if you think I left something out, or got something wrong. If you take a lot of photos and wish that they were all together and safe so you never had to worry about them - Google Photos is truly the best option.
Member Tutorial Videos:
497.GP-Install on iOS
496.GP-Install on Android
490.GP-Backup Complete
500.GP-Install Backup and Sync for Windows
476.GP-Manual upload from smartphone
475.GP-How to upload photos from an external hard drive
474.GP-Manual Upload from Mac Photos

  1. You need a Google account to use Google Photos. Make sure you know your username and password.
  2. To use Google Photos on a mobile device, download the free app from the App Store (iOS) or Play Store (android)
  3. Once the app is installed, open it and accept the default settings: 1. Your google account 2. High Quality file size 3. Only upload when on Wi-Fi
  4. You will immediately see the photos on your device. If your device is connected to Wi-Fi, it will start uploading (copying) all those photos to your account in the cloud.
  5. Your photos are not “in Google Photos” until the backup is complete. You must open the app to view the progress and watch for the message “Backup Complete”
  6. Once you see “Backup Complete” you can remove photos from your device and still see the Google Photos copy. But, DO NOT use the trash can for this, that erases the photo from everywhere – device AND cloud.
  7. Android note: your device may have photos in “Device Folders” other than the camera. They will not be included in Google Photos until you: menu, device folders, select the folder and turn on Back up & Sync.
  8. iOS note: if iCloud Photo Library setting is on, leave it on until Google Photos backup is complete. Do not delete photos or FREE UP Space using Google Photos while iCloud Photo Library is on because it will also delete them from iCloud.
  9. Optional: I recommend a second cloud backup service like One Drive, Dropbox, or Amazon before removing photos from your device. That’s a true backup.
  10. To remove all photos from your device and leave them in Google Photos – use the 3-line menu and FREE UP SPACE (iOS: Do not delete photos or FREE UP Space using Google Photos while iCloud Photo Library is on because it will also delete them from iCloud.)
  11. To use Google Photos on a computer there is no software to install, just go to the website, Photos.Google.com and sign in with your Google account.
  12. To upload pictures from your computer to Google Photos manually, you have 2 choices: 1. Drag and drop from computer folders to Google Photos website 2. From Google Photos website, use the Upload button.
  13. To upload pictures from your computer to Google Photos automatically, install the Backup and Sync app and set preferences to specify what photos you want uploaded and how you want them synced.
  14. All photos uploaded to Google Photos, from whatever device, will be included in the “Library.” The photo library is one giant stream of photos in order by date taken. There are NO folders.

The 14 points above are everything you need to know to successfully store your lifetime of photos for free, forever. Once they’re there, there is so much you can do with them!


  • Explore: Google automatically groups your photos by People, Places, and Things. It is so much fun to explore and find photos you’ve forgotten. You can also use Search, and find photos without the need to tag them first.
  • Edit: Google Photos has built in editing tools that can, so easily, make your pictures look better. It also works together with the Snapseed app for hundreds more, professional, editing tools.
  • Creations: it’s easy to make your own Albums, Collages, Animations, Movies, and even printed Books.
  • Sharing: your library of photos is private, for your eyes only, but Google Photos makes it easy to share the ones you want.
Here is one of our "What does this button do?" live YouTube shows: What's New with Google Photos

Please leave a comment if you use Google Photos and learned something in this article.

Continue your Education with Geeks on Tour by subscribing to our Newsletters!
Chris Guld is President and Teacher-in-Chief at GeeksOnTour.com. She has been in computer training and support since 1983 and owned a Computer Training Center called Computer Savvy from 1983-1996. She was one of the first WordPerfect Certified trainers in 1986; President of the International Computer Training Association in 1993; Author of the Beginner’s Guide to Picasa and the PicasaGeeks.com website. She is now a Top Contributor for the Google Photos Forum, author of Mrs. Geeks Guide to Google Photos, and owner of the LearnGooglePhotos.com blog. She loves to teach! If you want to learn, you’ve come to the right place.

Wednesday, December 6, 2017

Taking a trip? Don’t leave home without Google Photos on your phone.

20070414_port-everglades-18“I’m going on a 3 week cruise starting tomorrow and I’m afraid my phone will run out of space for taking photos.”

Don’t let that happen to you! And, don’t delete photos off your phone without making sure they’re backed up first!

We got together with our friends, Chris and Charles, the evening before they were to board a cruise ship for 3 weeks. I looked at Chris’ phone and saw that she only had a few hundred megabytes of free space on her phone. At that rate, she wouldn’t last one day of taking pictures before getting the dreaded, “Device Full” error message would appear. I looked in Settings and found that over 8 Gigabytes were in use storing nearly 4,000 pictures and videos. She needed to get serious about deleting them!

“I have them backed up on my computer, so it’s OK to delete them from the phone,” she said, “but, I don’t want to delete them all because I like looking at them on the phone. It’s just too much work to decide which to delete and which to keep, so I don’t do it.”

I told her if she used Google Photos, she can delete the photos from the phone, but still see them all using the Google Photos app after the pictures were uploaded to her Google account online. With the Google Photos “Free Up Space” command, all the photos can then be removed with one click. “Let’s do it!” she said.

How to prepare your phone for a trip:

  1. googlephotosInstall Google Photos app on your phone, get it from the App store on iOS or the Play store on Android. It’s free.
    - turn on “Backup and Sync” setting
    - make sure the Google account listed is correct for where you want your photos stored
    - make sure the upload size is High quality (free unlimited storage)
  2. Watch the photos being backed up! Just because you see photos in the Google Photos app does not mean they’re in your Google Photos account, it takes time. The app initially views the photos on your phone. Only when you see “Backup Complete” are you safe to delete them from the device. You may need to connect to a Wi-Fi hotspot because it can use a lot of data to do the backup.

  3. Verify that you can see your photos in your account online. Go to Photos.Google.com and log in with the same Google account used for the app on your phone. You should see all your pictures there.
  4. Now you can delete the photos. Don’t use the trashcan, that deletes from everywhere. Use the Google Photos app on your phone, tap the 3-line menu, Free Up Space. You will see a message about how many photos will be deleted and how much space will be freed up. If you are using an iPhone, and you have iCloud Photo Library turned on, realize these photos will be removed from all iCloud devices as well.

It took all night for Chris’ 4,000 pictures to be backed up. When we looked in the morning, the Google Photos app reported 110 photos remaining. It just took another half hour or so for those to complete. Using a computer, I had Chris sign in to her Google Photos account to prove that we could see her photos online that had just been backed up from her phone. Yes! All photos were there, so I had her open the Google Photos app, and tap the Free Up Space option. Seconds later, she had over 8 GB of free space, plenty for a few thousand pictures.

Bon Voyage Chris and Charles! I can already see from your Facebook photos that you’re having a good time!

Geeks on Tour premium members may also want to view these videos:

Friday, June 23, 2017

My iPhone is full of photos, can Google Photos help?

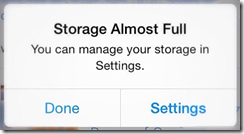
imagePeggy asks:  I’ve been taking photos with my iPhone for quite some time and have taken several hundred photos. The other day, I connected my iPhone to my Mac and now  I have over 4,000 photos on my phone. I’m getting a message that my phone’s storage is almost full. How did that happen? I don’t want to lose these photos, but I don’t need them on my phone. If I delete the photos, I understand that they will be deleted from my computer and iPad  also. Can Google Photos help?

What happened?

It sounds like your setting for Apple’s iCloud Photo Library got turned on. That means that Apple will keep all of your devices in Sync. Every photo will be on your computer, your iPhone, and your iPad. It is true, if you now delete any photos from your phone, they will be deleted from your other devices. Google Photos, on the other hand, will back up your photos and allow you to delete them from the phone.

Yes! Google Photos can help, but pay attention to your iCloud Photo Library settings

iCloud Photo Library is Apple’s solution for Backup and Sync for all your photos. It works differently than Google Photos Backup and Sync. Using them both will use up more iPhone storage space, and it will get complicated because of the way they handle deletions. With one exception,  I recommend using Google Photos and not iCloud Photo Library. The one exception is if it is important to you that the photos taken with your iPhone get automatically copied to your Mac’s hard drive, then you’ll want to stick with iCloud. With Google Photos, you can view your photos from your Mac (or any computer) by browsing to Photos.Google.com. They are not stored on your computer’s hard drive.

  • On your iPhone:  go to Settings, iCloud, Photos
  • Photo Stream, and iCloud Photo Sharing don’t matter, they can be either on or off
  • Look at iCloud Photo Library. If it’s Off, great! leave it off. Go to next step: Install Google Photos
  • If iCloud Photo Library is On, also notice if the box is checked for “Optimize iPhone Storage”
    • If “Optimize iPhone Storage” is not checked, you can turn off the iCloud Photo Library setting now. This will stop the iCloud Backup and Sync while leaving photos on your phone. If you delete a photo after turning it off, it will not be deleted from your other devices. Go to next step: Install Google Photos
    • If “Optimize iPhone Storage” IS checked, then turning off the iCloud Photo Library setting will stop the iCloud Backup and Sync, AND REMOVE ALL PHOTOS FROM YOUR PHONE. It won’t touch the photos on your Mac or iPad. Leave the iCloud Photo Library setting ON until the Google Photos backup is complete. Go to next step: Install Google Photos

Install Google Photos, turn on the Auto Backup & Sync feature, and wait until all photos are backed up. If you have thousands of photos on your phone, this will take days. Once they are all backed up to your Google Account, then you can turn off iCloud Photo Library and  use the Google Photos “Free Up Space” command to delete all photos remaining on your phone. Here’s the step by step:

  1. Install Google Photos from the App Store
  2. Sign in to your Google Account
  3. Turn on Auto Backup & Sync, connect to Wi-Fi, and leave the Google Photos app open on your phone while the backup is taking place. If you look at the assistant, you should see how many photos are remaining. Keep an eye on it.
  4. Wait until you see the message “Backup Complete” This may take hours or even days.
  5. Verify that all are backed up by viewing Photos.Google.com on another device like a computer
  6. Now you can turn off iCloud Photo Library. If your phone had the “optimize storage” setting checked, this will remove most photos from your phone. That’s OK. You’ll be using Google Photos from now on.
  7. Delete all photos from phone by using the Google Photos, 3-line menu, Free Up Space command.

You’ll still be able to see all your photos using the Google Photos app because it is viewing your photo library from the online copy. If you lose your phone, or should decide to remove the Google Photos app, you haven’t lost your photos. They are all stored in your Google account online and are visible from the website, photos.google.com or from any mobile device using the the Google Photos App.

iCloud Photo Library competes with Google Photos

You cannot Free Up Space until you disable iCloud Photo Library. You see, both Google Photos and Apple’s iCloud Photo Library serve the same purpose – copying your phone’s photos to cloud-based storage – but their philosophy is quite different.

  • Apple’s philosophy is hardware-based. Apple assumes you have an iPhone, an iPad, and a Mac computer and that you want all the pictures on all the devices. So, iCloud’s job is to keep all devices in sync. Add a photo to one, you add to all. Delete a photo from one, you delete from all.
  • Google’s philosophy is device-independent. Google thinks everything should be in the cloud, under the lock and key of your username and password, and all devices should access the content there. So, once the pictures are uploaded to your online Google account, you can delete them from the phone, or tablet, or computer.

Wednesday, June 7, 2017

Google Photos: Don't assume your photos are getting backed up

*Updated March 2020
  • It is Google Photos' job to back up your device's photos to your Google Account online
  • It's your job to verify that it gets done. 

There's nothing worse than thinking your photos are backed up, deleting them from your phone and then realizing they weren't backed up after all.
I'm currently traveling in Europe and taking hundreds of photos with my iPhone. I'm constantly checking that my photos are getting uploaded, and I'm not always happy with what I find. Whether it is a problem with the Google Photos app itself, or with the Internet connection, is hard to tell, but I often find that the backup process is stalled. Kind of like a clogged drainpipe, the upload process needs to be cleared and restarted. Using one or more of the following techniques, I have successfully ensured that all my photos got backed up / uploaded.

First Check your Backup Status

Tap on the account button in the upper right. You're looking for the message, "Backup Complete." You will other messages about the status of backing up. Something like "Backing up Photos: 321 items left" You will also see a progress bar that fills in blue from left to right. If you check this several times over the period of a day and see the same number left, then it's gotten stuck. It is not properly uploading your photos to your online account as it is supposed to do.
You may also see messages like "waiting for Connection" or "Backup and Sync is Off." These messages are very useful.

Check Photos.Google.com

Even if you see the message "Backup complete", I need to see for myself. Sometimes you see that all is complete, then a few minutes later it has more to backup?! The only way to know for sure that your photos have successfully made it to your Google account online is to use a computer (or any device other than the one that took the pictures) and see your photo library there. 
  • Using a computer browser, preferably Chrome, go to www.Photos.Google.com 
  • Make sure you are signed in to the same Google account used by your phone that took the photos. You can find that account address on your phone by going to Google Photos settings, Backup & Sync. The backup account will be listed there.
  • Look at your Photos library, check that the topmost photo is the most recent photo you took with the phone in question. Spot check previous photos
  • If your backup is not complete, read through the rest of this article for things to do to get the backup kick-started.

Your Internet Connection

First check your Google Photos settings under Backup and Sync. If "Use cellular data to back up ..." is off, then you must have a WiFi connection before any backup will happen. Even if your phone indicates that it has a good connection, you still need to test it by opening a browser window and visiting some website that would not be in your cache history. This is the only way to know for sure that your Internet connection is working well.

  • Open Chrome or Safari
  • Type in a website that you don't normally visit (I use msn.com or aol.com because they're short to type)
    • If the website comes up quickly, you're all set. Go on to Google Photos
    • If you see a log in screen, then you need to complete that process for the WiFi hotspot you're on, or find another WiFi hotspot
    • If the website just doesn't come up, or comes up very slowly then you know you have a very poor Internet connection and you'll just have to wait for later to get your photos backed up
  • Try resetting your Internet connection.
    • Turn on Airplane mode to disconnect from all communications
    • Turn Airplane mode back off - this forces your phone to re-connect and it usually gets a better connection. If not ...
    • Power off and Restart your phone
  • Find a better signal or WiFi connection. Just because you are connected, doesn't mean it's good enough to upload photos. Internet connections have 2 separate speeds: download and upload. Browsing the web uses the download capabilities, uploading photos needs the upload. I've found lots of Internet connections where the download is good, but the upload is not.

Google Photos App

If you know that your Internet connection is good, then there must be some problem with the operation of the Google Photos app. Things to try: 

  • Open the app, and leave it open, with the phone screen on and awake. On iPhone especially, the upload cannot take place in the background. This is quite annoying, but true. Even on Android, I find it is important to have the Google Photos app open for the upload to complete.
  • Force quit the app and re-open it. By "force-quit" I mean to open your recent apps screen on your phone (iPhone: double-tap the home button, Android: tap the multi-tasking button next to the home button) and tap the X on the Google Photos app, or swipe the app off the screen. Now, when you re-open the Google Photos app, it is forced to start fresh. See if it has started backing up now by checking your account button. You may have to wait a minute or two.
  • Manually backup some photos/videos: try finding a photo that has not been backed up yet. If you see a report that some photos were skipped, open one of those skipped photos.

     On iOS a photo that is still waiting to be backed up has a circular arrow icon. Select it, tap the 3-dot menu then Back up. If that operation completes successfully, check your assistant to see if backup has resumed. If not ...
  • Power off and restart your device.
  • If your remaining photos are still not backing up, try uninstalling the Google Photos app and then re-installing it. This will have no effect on your photos, Google Photos does not store your photos in the app itself. They are stored online.

Google Photos Help

Here is the official Google Photos help page all about Backup and Sync.

Make a Second Backup before Deleting

Before I use the Free Up Space command to delete the photos from my phone, I want one more layer of protection. Since the Google Photos copy of my pictures is my working copy, I don't consider that a true backup (see previous article: Google Photos is not a "Backup" of your Photos. I use the OneDrive app for this purpose. Other possibilities are Amazon Photos, Dropbox, Facebook, or copying to a computer via a cable connection.

6/13/17 Additional Notes

After several frustrating days of taking hundreds of photos and not getting them backed up I have reached a couple of conclusions:

  1. A stalled backup is almost always due to poor Internet connection. It's the upload speed that counts here, so even though a connection may be good enough to read your email, it may not be good enough to upload your photos. You need to find a better connection.
  2. Google Photos has some problem with iPhone Live Photos. When it comes to Live Photos, it stalls the backup process until you force it. You gotta watch it constantly and be ready to force quit the app and restart. At least that's the way I did it - it may also work to turn off Auto Backup then turn back on.

Chris Guld is President and Teacher-in-Chief at GeeksOnTour.com. She has been in computer training and support since 1983. She is now a Top Contributor for the Google Photos Forum, owner of the LearnGooglePhotos.com blog, and author of Mrs. Geek's Guide to Google Photos
She loves to teach! If you want to learn, you’ve come to the right place.

Saturday, December 31, 2016

Getting a New Phone? Wait! Don’t Lose Your Pictures

Get your Mrs. Geek's Guide to Google Photos!
Google Photos is the best way to store your entire library of photos in one place. If you do it right, you will never need to worry about losing your photos.

Before you Give Up Your Old Phone

Notice that I said IF YOU DO IT RIGHT, you will never need to  worry. So, what do I mean by doing it right? There are 2 things you must do before you give up (or wipe out) your old phone.
  1. Make sure your Photos have been backed up to your Google Account. Look at your Google Photos on your old phone. If you see an icon in the lower right corner of any of your thumbnails - either a circular arrow, or a cloud with a slash thru it – that means the photo has not been backed up. You are viewing the picture stored on your device.
    picsondevice
  2. Check the Google Account being used for the Back up & Sync setting. You may have forgotten that you set up your old phone with a Google account that you don’t use any more. To see what Google account is in use,
    1. Open your Google Photos app, tap the 3-line menu in upper left and then Settings
    2. The first item should say, “Back up & Sync: Backing up to myaccount@gmail.com
    3. Make a note of that email address – that is your Google account. You also need to know your password. If you need help with that, visit https://accounts.google.com.
The best way to check both issues at once is to use a computer, go to https://photos.google.com/ and sign in to the account you think stores your photos and see if they’re there! Your account shows in the upper right corner of the photos. If you see your photos then you know they’ve successfully made it to the cloud, AND you know you have the correct Google account username and password. You’re all set to use any device at hand and see all your photos.

Setting up your New Phone

If all the photos from your old phone were successfully backed up, and you know the account that was used, then setting up a new phone is a piece of cake!
  1. Get the Google Photos app from the App store (iOS) or the Play store (Android) and Install it.
  2. Verify that the correct Google account is being used
  3. Open the Google Photos app and see all your pictures!
Note: you will need Internet access, either with Wi-Fi or your cellular data. The pictures are not stored on the phone, they are stored online, so you need access to view them. However, as you view them, Google Photos builds a library of photo thumbnails in cache memory in your phone. After a while, you will be able to view much of your photos even without being connected.

Here is a 6 minute video that demonstrates all of the above.

Monday, November 14, 2016

Google Photos is NOT a "Backup" of Your Photos

A Backup is an EXTRA copy kept in a safe place.
First, here's the definition of "Backup" that I use:
The procedure for making extra copies of data in case the original is lost or damaged.

Backup files are EXTRA copies. 

These extra files are stored in a safe place where they will not be touched unless you need them. 
When you use the Google Photos app on your phone or tablet, you turn on the setting called "Backup and Sync." I wish this was called "Upload and Sync" because it does not meet my definition of Backup.


Google Photos are Working Copies

With the Backup and Sync feature turned on, Google Photos will automatically upload  every photo you take with your phone to the cloud - in your specified Google account. This is great! If you drop your phone overboard, your photos are not lost! So far, it does sound like a backup.

But, after your photos are uploaded, you are encouraged to work with them there. You can edit, delete, create, and share your photos using the Google Photos copy. These are not extra copies - they are the working copy of your photos. If you delete these, they're gone, unless you have an extra copy somewhere.

You are also encouraged to "Free up Space" on your phone by deleting the photos from your phone. Now the Google Photos copy is your only copy!
See other article: Three Ways to Delete Photos with Google Photos


How to make a Backup of your Smartphone Photos

It is your responsibility to make a true backup of your photos. Google Photos, all by itself, is not doing that for you.

Automatic method: use another cloud storage service like Dropbox, or OneDrive, or Amazon Cloud. I use OneDrive. Just download the OneDrive app to your phone, go into settings, and turn on Camera Upload. That automatically uploads a copy of every photo to my Microsoft OneDrive account.

Since this is in addition to Google Photos, the OneDrive copy is an extra copy! A backup. I rarely touch these photos since I prefer to work with the Google Photos app. An extra benefit of OneDrive is that you can choose to also synchronize with your computer's hard drive, so your photos are automatically on your computer, available offline. Now you have 2 extra copies! It's starting to feel very safe now.
See other article: Getting your Photos Down From the Google Photos Cloud

Manual Backup: you can manually connect your phone to your computer and copy pictures to your hard drive. Use the charging cable that came with your computer. There is a USB connection on the end to plug into the computer. Then, follow the prompts on both your computer screen and the phone screen to establish the phone as a drive that your computer can see. Then use standard copy/paste functions to get the pictures from your phone to your computer.

Continue your Education with Geeks on Tour by subscribing to our Newsletters!
Chris Guld is President and Teacher-in-Chief at GeeksOnTour.com. She has been in computer training and support since 1983 and owned a Computer Training Center called Computer Savvy from 1983-1996. She was one of the first WordPerfect Certified trainers in 1986; President of the International Computer Training Association in 1993; Author of the Beginner’s Guide to Picasa and the PicasaGeeks.com website. She is now a Top Contributor for the Google Photos Forum and owner of the LearnGooglePhotos.com blog. She loves to teach! If you want to learn, you’ve come to the right place.

Tuesday, June 7, 2016

Google Photos–Is it Really Unlimited and Free?

Google Photos will store your entire library, many thousands of photos, for free!
Google Photos will store your entire 
library, many thousands of photos, for free!
YES!! If you choose the photo size called High Quality and not Original, Google Photos will store your entire photo library of many thousands of photos, for free. Learn more from the Google Photos Help page.

What is High Quality?

At the High Quality size, Google maintains your photos’ pixels up to 16 MegaPixels. That’s 4,000 X 4,000. That’s more than most digital cameras offer today. It’s big. So it sounds like it only reduces your photo if it’s more than 16 megapixels right? Well, not exactly. It does take your photo and compresses the file size while maintaining the same number of pixels. Your 12 megapixel photo will still be 12 megapixels, but where the .jpg file for the original photo may have been 3 MB (megabytes), the file that is uploaded is compressed to about half that.
If you take pictures for personal use, just select High Quality and don’t even think about it. It is truly high quality. That’s is big enough to completely fill your computer screen and be very sharp. I have printed 8X10 glossies of a picture using the original .jpg file and using the compressed ‘High Quality” file and I could not tell the difference.
If you are a professional photographer who may want your picture to grace the cover of a magazine, that’s another story. I’m sure you want your original. So keep the original somewhere, but you may still want to use Google Photos at the High Quality setting. The smaller files give you a faster experience when viewing, searching, uploading, downloading,and sharing than the full size.

image

If I have Unlimited storage, why does it say I have 13 Gigabytes remaining?

Google gives everyone 15 Gigabytes of storage for free. This storage is shared by all your Google services; Gmail, Google Drive, Contacts, Photos, etc. So, Gmail and Drive may be taking up 2 Gigabytes, for example, bringing your quota down to 13. Photos uploaded using Google Photos at High Quality do not count. So, if you uploaded even 20 Gigabytes of photos, you would still have 13 GB of your quota left.
If you upload photos using Google Drive, they will count against your quota. It’s only when you upload using the Google Photos Backup and Sync, with setting at High Quality, that they don’t count.

What about Pictures I already uploaded at Original Size?

Google now gives you a way to retroactively set past uploads to the High Quality and thus recover the storage space used up on your quota. Using a computer, go to Photos.Google.com, click on the 3 line menu and then Settings. You’ll see an option to Recover Storage. Click that and any already uploaded pictures will be compressed.
image

Does Uploading Pictures with Picasa use the High Quality Setting?

No. Picasa still uses an old standard size called “Best for Sharing.” This is defined as 2048 pixels on the longest side. To put it in the same terms, let’s say a picture is 2048X2048 – that would be just over 4 MegaPixels – or 1/4 the size of the new “High Quality.”
Here’s what you do: Use Picasa to upload photos at the Original Size option. This will count against your storage quota from Google, but you can later use the option to Recover Storage and retroactively compress those files.

Wednesday, May 11, 2016

Google Photos vs. Apple’s iCloud Photo Library

Apple-Google*updated 9/25/18
If you use an iPhone, you are in the Apple world, and it seems logical to use the Apple photo solutions: Apple Photos and iCloud Photo Library. But, you also have the option to use the Google solution called Google Photos.

Have you been getting frustrated with constant messages by Apple that your iPhone is FULL, or that you need to buy more iCloud space?  Or are you simply confused about how your iPhone works with iCloud and your Mac or PC computer? Then you owe it to yourself to take a look at Google Photos. And, if you have an Android device, Google Photos is the logical choice. I am a Google fan-girl, and I use Google Photos for all my photos. I use an iPhone and Windows computer. I also have an iPad, an Android phone, and a Mac computer so that I can test how things work and be able to help people who use either system. After using Google Photos for the 3 years since it was released, and exploring the Apple iCloud system throughout that time, I think I’ve come up with the fundamental differences. First let me tell you how they are alike, and a little about how they work.

The Common Purpose

Both Google Photos and Apple’s iCloud Photo Library (different from Photo Stream) will store all of your photos online (aka “in the Cloud”) and allow you to view them all using a mobile device or computer. Both of them will automatically upload photos taken by your phone (or tablet) to your account online. Once all your photos are collected online, you can view them by going to a website (photos.google.com or iCloud.com) or using an App on your mobile device. Both Apple’s App and Google’s App are called “Photos.” But that’s where the similarities end.

The Fundamental Differences

  1. Devices Supported:
    Apple’s iCloud supports iOS, Mac, and PC, but not Android.
    Google Photos supports iOS, Mac, PC, and Android. So, if you have an Android device that you use to take pictures, Apple’s iCloud solution is off the table.
  2. Deleting Photos from Device:
    Apple’s iCloud Photo Library cannot delete from device. If you delete a photo from any device using iCloud Photo Library it is deleted from every other device. There is one exception – if you have installed iCloud Photo Library on your Windows computer, it will receive all new photos added, but will not remove photos deleted from elsewhere. In other words, there is no “Sync’ing” with iCloud photos on Windows after the initial download of the photos.
    Google Photos allows you to delete photos from the mobile device that took the picture, while leaving the photo available in the Cloud.
  3. Basic Cloud Philosophy:
    Apple: Apple uses the Cloud as a service to keep devices in sync. You can see the photos by going to iCloud.com, but you can’t do anything with them there.
    If you delete from one, you delete from all


    Google
    : Google uses the Cloud as the end game. It is where all our our photos collect and live forever. You can edit and create with them there.
    After photos are uploaded to cloud, you can Free Up Space, removing photos from the device, while remaining in cloud
  4. Original vs. Compressed File Size:
    Apple Apple uploads your original size photo and allows you to shrink the copy left on your phone.
    Google Google allows you to shrink the photo that is uploaded and leaves the copy on your phone untouched. You can then delete the phone copy by using the command to Free Up Space. I prefer Google’s method since it takes less bandwidth to upload smaller photos online. It also means that your web photos will be faster to view and use. Google’s compressed size is called “High Quality” and it maintains up to 16 Megapixels of photo quality while compressing the file size by about half. These are plenty good enough quality for family memories, you can print a good 8X10. If I really want to keep the original, I can use another method to copy my original photos. Either another cloud service like OneDrive, DropBox, or Amazon, or use a USB cable and copy the photos to my computer.
  5. Cost:
    Apple gives you 5GB of free iCloud storage space. That fills up quickly with full size photos. For only $1/mo you can purchase 50GB more. That is certainly cheap enough – I don’t mind pay the $1, what I mind is having to pay attention!
    Google gives you unlimited Free storage for photos IF you use the “High Quality” size discussed in #4 above. The High Quality unlimited free option is our recommendation. If you choose to upload your original quality photos, they will count against your 15GB of free Google storage. To buy more, is $1.99/mo for 100GB.
  6. Sync with Computer
    Apple iCloud
    sees your Mac computer as another sync’ed device as long as you have iCloud Photo Library turned on. Add a photo from any device and it adds to every other one, delete a photo from any device and it deletes from all. The Photos App has a version that runs on the Mac - so your Mac computer is like a mobile device in the way Photos works. You can, however specify original sized photos to be used on the Mac. Windows computers have a version of iCloud Photo Library which will download the pictures, but there is no Windows version of the Photos app, so there is no synchronizing.
    Google Photos only sees computers as a source of photos, computers are not sync’ed devices.** You can upload photos from a Computer to the Google Photos library in the Cloud, but the connection ends there. Deleting from the library or from the computer will not delete from the other. Editing a photo on either side will not update to the other. You can also download photos from your online library to your computer.
    ** - if you use Google's Backup and Sync to upload from computer to Google Drive, there is an option to sync with Computer.

Moving to Google Photos

If you agree with me that Google is the better option, the next question is: How do I get my pictures from Apple’s iCloud Photo Library to Google Photos? You can Install the Google Photos App on your iPhone or iPad and turn on Backup and Sync. Assuming you have iCloud Photo Library turned on, this will upload your complete iCloud Photo Library to Google Photos. It starts with your earliest photos and works its way to the present. In my test it was able to upload 400-500 photos per hour. Be aware that this may be using your data! Check the option for using Wi-Fi only. Of course, your mileage may vary especially depending on your Internet connection speed!

You may question if using your mobile device is the best way. If you have your iCloud Photo Library set to “Optimize iPhone Storage” then you don't have the full size photos on your device. Is Google Photos using those and adding its own compression as well? No. My experiments and research indicates that Google sees the "optimized photo" and requests the full-size photo from Apple before it adds its compression and uploads. This takes time and bandwidth, but it works just fine. (read more in this forum thread.)

If you are a Geeks On Tour member, we have a full series of tutorial videos on Google Photos. Here are the Learning Guides for getting started.


Chris Guld is President and Teacher-in-Chief at GeeksOnTour.com. She has been in computer training and support since 1983. She is now a Top Contributor for the Google Photos Forum, owner of the LearnGooglePhotos.com blog, and author of Mrs. Geek's Guide to Google Photos
She loves to teach! If you want to learn, you’ve come to the right place.

Wednesday, February 24, 2016

Google Photos: All Play and No Work!

I went for a walk with my Mom the other afternoon. We have this favorite little park, and it was a gorgeous day. She’s walking pretty slow these days, so I had ample opportunity to take my phone out of my pocket and snap pictures. I showed her each picture I took and she would point out something else worthy of a shot.

Editing Pictures as you Take Them is FUN

I was excited to catch the duck in flight just as it came in for a landing. Then I looked at the photo on my phone and realized that you couldn’t even see the duck! It needed to be cropped. No problem, with no tools other than my finger and the phone, I tap on the little pencil that brings up Google Photos editing tools, tap the crop tool and drag a corner in closer to the duck while still leaving some of the lily pads in the shot. I tap the checkmark to signal that I’m done with cropping, Then, one tap on the Auto adjustment gives me a better look.

The second picture below just has an auto adjustment applied, and the third has a crop and auto adjustment.

image image
image image
image image

Yes you can make a collage on your phone

I took a few more pictures, including a selfie of Mom and me that needed no improvement at all! It was such a nice day I wanted to share it with my friends on Facebook, but I didn’t want to post multiple pictures, so I decided to make a collage. Still using nothing but Google Photos on my phone:

  1. I select 7 pictures
  2. Tap the + button in the upper right
  3. Choose Collage
  4. Voila!

image

While viewing the collage, I tap the share button image, choose Facebook, and post to Friends. I also tapped the + and added the collage to my monthly Web Album on Google Photos.

During this lovely one hour walk, I took pictures, enjoyed having Mom point out more pictures, had fun editing them, and shared a collage to Facebook, and added the day’s collage to my monthly album … all before even getting back to the car!

Google Photos has removed all the work and left only the play

In years past, I would have taken my digital SLR camera – a Canon Rebel T3i – and taken many of the same pictures. After getting home I would need to transfer them from the camera to the computer, decide where to store them, spend some time doing the editing, upload the best ones to the web, make the collage and upload that too. That would probably take me a half hour using Picasa, much longer with other software. A half hour may not sound like much, but when you multiply that times all the days and all the pictures I like to take – well, I think you get the idea. And, worse than the time it takes is when I didn’t take the time and never enjoyed my pictures or shared them.

I love playing with my pictures and trying out the different creations that Google Photos includes. And, at the end of the day, I’m done. All my photos are safely, and privately, stored in my Google Account in the cloud. I can delete them from my phone to free up space for taking more! I also have Microsoft OneDrive grabbing a copy of all my phone’s photos for the ‘belt and suspenders’ protection. This is all automatic.

No work and all play makes me a happy girl!

You can learn to use Google Photos with Geeks on Tour tutorial videos. Some are free. To watch them all, you need to be a Geeks on Tour premium member. Here's a video that demonstrates exactly what I did in this article: