
 If you use an iPhone, you are in the Apple world, and it seems logical to use the Apple photo solutions: Apple Photos and iCloud Photo Library. But, you also have the option to use the Google solution called Google Photos.
Have you been getting frustrated with constant messages by Apple that your iPhone is FULL, or that you need to buy more iCloud space? Or are you simply confused about how your iPhone works with iCloud and your Mac or PC computer? Then you owe it to yourself to take a look at Google Photos. And, if you have an Android device, Google Photos is the logical choice. I am a Google fan-girl, and I use Google Photos for all my photos. I use an iPhone and Windows computer. I also have an iPad, an Android phone, and a Mac computer so that I can test how things work and be able to help people who use either system. After using Google Photos for the 3 years since it was released, and exploring the Apple iCloud system throughout that time, I think I’ve come up with the fundamental differences. First let me tell you how they are alike, and a little about how they work.
The Common Purpose
Both Google Photos and Apple’s iCloud Photo Library (different from Photo Stream) will store all of your photos online (aka “in the Cloud”) and allow you to view them all using a mobile device or computer. Both of them will automatically upload photos taken by your phone (or tablet) to your account online. Once all your photos are collected online, you can view them by going to a website (photos.google.com or iCloud.com) or using an App on your mobile device. Both Apple’s App and Google’s App are called “Photos.” But that’s where the similarities end.The Fundamental Differences
- Devices Supported:
Apple’s iCloud supports iOS, Mac, and PC, but not Android.
Google Photos supports iOS, Mac, PC, and Android. So, if you have an Android device that you use to take pictures, Apple’s iCloud solution is off the table. - Deleting Photos from Device:
Apple’s iCloud Photo Library cannot delete from device. If you delete a photo from any device using iCloud Photo Library it is deleted from every other device. There is one exception – if you have installed iCloud Photo Library on your Windows computer, it will receive all new photos added, but will not remove photos deleted from elsewhere. In other words, there is no “Sync’ing” with iCloud photos on Windows after the initial download of the photos.
Google Photos allows you to delete photos from the mobile device that took the picture, while leaving the photo available in the Cloud. - Basic Cloud Philosophy:
Apple: Apple uses the Cloud as a service to keep devices in sync. You can see the photos by going to iCloud.com, but you can’t do anything with them there.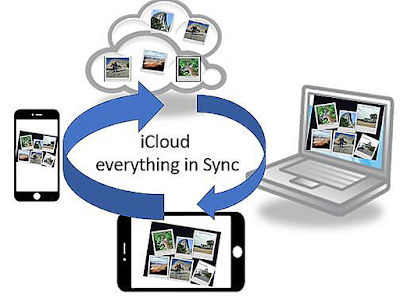
If you delete from one, you delete from all
Google: Google uses the Cloud as the end game. It is where all our our photos collect and live forever. You can edit and create with them there.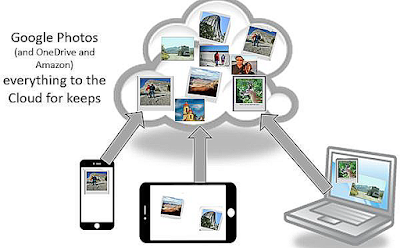
After photos are uploaded to cloud, you can Free Up Space, removing photos from the device, while remaining in cloud - Original vs. Compressed File Size:
Apple Apple uploads your original size photo and allows you to shrink the copy left on your phone.
Google Google allows you to shrink the photo that is uploaded and leaves the copy on your phone untouched. You can then delete the phone copy by using the command to Free Up Space. I prefer Google’s method since it takes less bandwidth to upload smaller photos online. It also means that your web photos will be faster to view and use. Google’s compressed size is called “Storage Saver” and it maintains up to 16 Megapixels of photo quality while compressing the file size by about half. These are plenty good enough quality for family memories, you can print a good 8X10. If I really want to keep the original, I can use another method to copy my original photos. Either another cloud service like OneDrive, DropBox, or Amazon, or use a USB cable and copy the photos to my computer. - Cost:
Apple gives you 5GB of free iCloud storage space. That fills up quickly with full size photos. For only $1/mo you can purchase 50GB more. That is certainly cheap enough.
Google gives you 15GB of free storage. To buy more, is $1.99/mo for 100GB. - Sync with Computer
Apple iCloud sees your Mac computer as another sync’ed device as long as you have iCloud Photo Library turned on. Add a photo from any device and it adds to every other one, delete a photo from any device and it deletes from all. The Photos App has a version that runs on the Mac - so your Mac computer is like a mobile device in the way Photos works. You can, however specify original sized photos to be used on the Mac. Windows computers have a version of iCloud Photo Library which will download the pictures, but there is no Windows version of the Photos app, so there is no synchronizing.
Google Photos only sees computers as a source of photos, computers are not sync’ed devices.** You can upload photos from a Computer to the Google Photos library in the Cloud, but the connection ends there. Deleting from the library or from the computer will not delete from the other. Editing a photo on either side will not update to the other. You can also download photos from your online library to your computer.


Moving to Google Photos
If you agree with me that Google is the better option, the next question is: How do I get my pictures from Apple’s iCloud Photo Library to Google Photos? You can Install the Google Photos App on your iPhone or iPad and turn on Backup and Sync. Assuming you have iCloud Photo Library turned on, this will upload your complete iCloud Photo Library to Google Photos. It starts with your earliest photos and works its way to the present. In my test it was able to upload 400-500 photos per hour. Be aware that this may be using your data! Check the option for using Wi-Fi only. Of course, your mileage may vary especially depending on your Internet connection speed!You may question if using your mobile device is the best way. If you have your iCloud Photo Library set to “Optimize iPhone Storage” then you don't have the full size photos on your device. Is Google Photos using those and adding its own compression as well? No. My experiments and research indicates that Google sees the "optimized photo" and requests the full-size photo from iCloud before it adds its compression and uploads. This takes time and bandwidth, but it works just fine.
If you are a Geeks On Tour member, we have a full series of tutorial videos on Google Photos.
Chris Guld is President and Teacher-in-Chief at GeeksOnTour.com. She has been in computer training and support since 1983. She is now a Product Expert for the Google Photos Forum, owner of the LearnGooglePhotos.com blog, and author of Learn Google Photos.
She loves to teach! If you want to learn, you’ve come to the right place.


